Thursday, September 27, 2007

How to BBQ - Cooking Measurements - Part 2


How to BBQ - Cooking Measurements - Part 2
by Joe "Woods Goods and Stuff"

How to BBQ - Cooking Measurements - Part 2

Liquid Measure Equivalents (United States)
  • dash = less than 1/8 teaspoon (tsp)
  • 1 teaspoon (tsp) = 1/3 tablespoon (Tbs)
  • 1 Tbs = 1/16 cup, 3 tsp
  • 2 Tbs = 1/8 cup, 1 fluid ounce
  • 4 Tbs = 1/4 cup, 2 fluid ounces
  • 8 Tbs = 1/2 cup, 4 fluid ounces, 1 gill
  • 16 Tbs = 1 cup, 8 fluid ounces, 1/2 pint
  • 1/4 cup = 4 Tbs
  • 1/3 cup = 5 Tbs + 1 tsp
  • 3/8 cup = 1/4 cup + 2 Tbs
  • 1/2 cup = 8 Tbs
  • 5/8 cup = 1/2 cup + 2 Tbs
  • 2/3 cup = 10 Tbs + 2 tsp
  • 3/4 cup = 12 Tbs
  • 7/8 cup = 3/4 cups + 2 Tbs
  • 1 cup = 8 fluid ounces, 1/2 pint
  • 2 cups = 16 fluid ounces, 1 pint
  • 4 cups = 2 pints, 1 quart
  • 16 cups = 8 pints, 4 quarts, 1 gallon

United States Liquid Measure Conversions

  • 1 tablespoon = 16 ml, 1/2 fl US oz
  • 1 cup = 225 ml, 8 fl US oz
  • 1 pint = 450 ml, 16 fl US oz
Australian Liquid Measure Conversions
  • 1 tablespoon = 20 ml

Weight Conversions

  • 1 ounce = 28.4 g (can usually be rounded to 25 or 30)
  • 1 pound (lb) = 454 g
  • 1 kg = 2.2 pounds (lbs)

Miscellaneous

  • 1 stick of butter = 4 oz, 1/2 US cup, about 114 grams, 1/4 pound, 8 Tbs
  • 1 oz cheese (grated) = 4 level tablespoons
  • 1 oz cocoa or chocolate powder = 3 level tablespoons
  • 1 oz coconut (desiccated) = 4 level tablespoons
  • 1 oz flour (unsifted) = 3 level tablespoons
  • 1 oz sugar (castor/caster) = 2 level tablespoons
  • 1 oz sugar (granulated) = 2 level tablespoons
  • 1 oz sugar (icing) = 2 1/2 level tablespoons
  • 1 oz syrup (golden) = 1 level tablespoon
How to BBQ - Cooking Measurements
by Joe "Woods Goods and Stuff"

How to BBQ - Cooking Measurements


How to BBQ - Cooking Measurements
by Joe "Woods Goods and Stuff"

Except in industry, the United States, despite some attempts, has never adopted the metric system of Cooking Measurement used in most of the rest of the world. Americans measure distances in miles (each one divided into 1760 yards or 5280 feet) and worry about putting on a few extra pounds (each divided into 16 ounces) after a heavy meal.

Most world cuisines use metric weights for non-liquid ingredients and metric volumes for liquids. The United States uses its own system of volumetric measurements for most ingredients, weights for others, and sometimes expresses amounts in both, as in “one pint (8 ounces) of milk” or “four tablespoons (two ounces) of butter.” The liquid “ounces” in the first example and the solid “ounces” in the second have the same name, but reflect two different measurement systems. A solid “cup” of flour and a liquid “cup” of milk show a similar discrepancy.

All this can be confusing to non-Americans, but American cooks take it in stride. The fact that the world metric system makes eminent logical sense is meaningless to a cook raised with pounds and ounces, teaspoons and tablespoons, cups, pints, quarts, and the like. British cooks, or Americans trying to use British recipes, can become even more confused, since the British and American systems used many common measurement names, yet the measurements aren’t always the same.

American recipes refer almost uniformly to the Fahrenheit system of heat measurement in which 32 degrees is the freezing point and 212 degrees the boiling point, equivalent to zero and 100 degrees Celsius, respectively.

Because of the proliferation of food information from all over the world, the savvy American cook knows how to deal in metrics and may even have metric measuring tools and scales. Nevertheless, for those who are confused, here are some American food measurement basics:

  • Liquid measurements (from small to large) can be expressed in teaspoons, tablespoons, fluid ounces, cups, pints, quarts and gallons.

  • A liquid tablespoon is three teaspoons. Sets of calibrated measuring spoons are usually available in quarter teaspoon, half teaspoon, teaspoon, tablespoon, and two-tablespoon (coffee scoop) sizes. Cooks use these spoons for measuring out small amounts of ingredients like extracts, salt and pepper, spices, minced garlic, chilies, and alcoholic beverages used in cooking.

  • From the standpoint of the fluid ounce, a single fluid ounce is two tablespoons. Eight fluid ounces make up a cup, sixteen ounces a pint, thirty-two ounces a quart.

  • From the standpoint of the fluid cup, two cups make a pint, four cups make a quart, sixteen cups a gallon.

  • From the standpoint of the pint, two pints make a quart, eight pints a gallon (four quarts). Warning: Dry measure pints and quarts (2 pints), used for fruits and vegetables, are slightly larger (by about one-sixth) than liquid measure pints and quarts. Larger dry measures like pecks (8 dry quarts or 16 dry pints) and bushels (4 pecks, 32 quarts, 64 pints) are used mainly in agriculture.

  • Dry ingredients, particularly in baking, may be given in traditional weights (16 dry ounces make one pound) or in a system of cups that do not match exactly the liquid type of “cup” measurement. To make the system more confusing, because of the different textures of ingredients, a “cup” of one ingredient may not weigh the same as a “cup” of another. A cup of unsifted flour weighs five ounces, a cup of granulated sugar weighs seven ounces, while a cup of butter (2 sticks) weighs eight ounces.

For dry “cup” weight, stainless steel nested measuring sets usually contain one cup, half cup, quarter cup and eighth cup sizes. Glass or Pyrex liquid measuring cups usually have spouts and are often calibrated both in traditional and metric liquid scales; one cup, two cup (one pint), and quart sizes are common. Most cooking scales, mechanical or electronic, are calibrated for both traditional and metric systems.

The new cook in America is well advised to take some care in interpreting American recipes, especially for baked goods, using metric conversion tables when available, and common sense at all times. Recipe software packages and Internet recipe sites may have a feature that allows conversion of units automatically. A good rule of thumb for a cook is the notion that if a recipe seems not to be carefully and consistently written, the dish itself may be something of a risk. The best recipe writers know how to express themselves with clarity and consistency.

How to BBQ - Cooking Measurements
by Joe "Woods Goods and Stuff"

How To BBQ - Steak


How To BBQ - Steak
by Joe "Woods Goods and Stuff"

How to BBQ - Steak
Ingredients:
Steak - 100% Canadian "AAA" Beef if available, or USDA Prime or Choice U.S. beef or well trimmed Black Angus
Garlic Clove
Salt
Olive Oil
Soy sauce or Teriyaki sauce
A Lemon or Lime
Dijon mustard or Chili sauce
Spices: Cumin, Cilantro, Salt, and Pepper
Brown sugar
Beer
Black Pepper

Directions for: How To BBQ - Steak
  1. Choose a nice cut of steak from the butcher or local supermarket; cuts from the tenderloin or rib are best. Excellent cuts include T-bone, rib eye, club, porterhouse, N.Y. Strip, Chateaubriand, and filet mignon. Choose the best grade you can afford: In the USA, that is: Prime (best), Choice (very good), Select (average). Prime grade can be difficult to find, so call several butchers to locate. Be prepared to pay at least USD$15 to USD$25 per pound for Prime. Aged Prime is superior, but aged meats aren't for everyone.
  2. Remove steak from refrigerator about 90 minutes before cooking. The steak should be at room temperature before it touches the grill.
  3. Peel a clove of garlic and crush lightly to release juices.
  4. Rub crushed garlic clove onto all sides of the steak.
  5. Coat each side of the steak with fresh ground black pepper and salt. Gently press spices into the flesh.
  6. For inexpensive cuts, squeeze the juice of half a lemon or lime on both sides of the steak. This will help tenderize the tougher steaks.
  7. A marinade can help less tender cuts, such as flank. It can improve the taste and tenderize select grade steaks as well.
  8. Do not marinate aged choice or prime beef, or you will ruin the steak!
  9. Preheat gas grill on high for 10 to 20 minutes. If you pay close attention, you will not overcook your steak. Be prepared to douse flare-ups with water.
  10. Grill steak on high for four minutes with lid closed. The key to a great steak is very high heat, so make sure your grill is on the highest setting possible.
  11. Flip steak using tongs or spatula, do not use a fork as you will lose juices.
  12. Grill on high for another four minutes with lid closed. Your steak will be about medium rare, depending on thickness.
  13. Remove steak from grill and immediately place on a warmed platter.
  14. Allow steak to rest for a full five minutes before cutting. This allows the juices and full flavors to develop.

Tips

  • Keep some freshly prepared marinade on the side if you're going to apply while cooking - Never allow marinade that has come in contact with raw meat to be applied during cooking - it not only increases unhealthy bacteria, but also tends to destroy the flavor of a good cut of meat.
  • If you have a small brush, apply the extra marinade from dish to steak while cooking or brush your steak with your favorite HP or Teriyaki sauce while cooking.
  • How do you know when your steak is done? Here are some tips using a 1" cut of meat as an example...

    • Rare (all red in the middle) 120-125 degrees, feels roughly like the flesh between the thumb and the forefinger of a relaxed hand
    • Medium Rare (all pink in the middle) 125-140 degrees
    • Medium / Medium Well (some pink in the middle/mostly gray) 145-155 degrees, feels roughly like the flesh between the thumb and the forefinger of a straightened hand
    • Well Done (all gray in middle), >160 degrees, feels roughly like the flesh between the thumb and the forefinger of a clenched hand
  • Fool-proof method for getting perfect medium steaks: Leave the steak to cook on one side (do not touch!). When you see blood rising on the upper side turn over and cook the other side for almost as long as the first side.
  • In a shallow dish, mix the following:
    • 1 cup of olive oil with 1/2 cup of soy sauce or teriyaki sauce
    • freshly ground pepper and salt to taste
    • juice of 1/2 lemon
    • 1 teaspoon of dijon mustard or chili sauce
    • spices (i.e. 1 tsp cumin, 1 tbsp cilantro)
    • 1 tbsp brown sugar and beer to taste
    Marinate the steak for at least 3 hours to a full 24 hours.
Warning

Do not overcook steak.
Optionally preheat for 5 minutes on high, all burners. Open grill and leave all burners on high! Add steak. Close grill lid. Cook on first side, depending on steak thickness and desired style (med rare, med, well) for 4 minutes, flip, and cook on the other side for 4 minutes.
Never, ever poke holes in your steak. It will lose valuable juices.

Alternate Method

  1. Use these ingredients instead: Fresh ground pepper, salt, lime, beer, and chili powder. Feel free to add more spices depending on your preference and taste.
  2. Transfer beer into a bowl (big enough to contain the steak) and season it with chili powder.
  3. Get half of the lime, squeeze some to the marinade sauce.
  4. Soak the beef in the marinade for around 30 minutes inside a refrigerator.
  5. Before setting it off to be grilled, give the steak a good rubbing of fresh ground pepper and salt.
  6. Let the steak sit in a prepared sauce some 20 minutes or even as long as 6 hours. This would ensure that all the good flavors of the ingredients would be absorbed by the meat.


How To BBQ - Steak
by Joe "Woods Goods and Stuff"

Tuesday, September 25, 2007

How To BBQ - Ribs


How To BBQ - Ribs
by Joe "Woods Goods and Stuff"

Items you will need for How to BBQ - Ribs

* Pork or Beef Ribs(as many as you like)
* Aluminum Foil
* Italian Dressing
* Wood of your Choice
* Your choice of Rub
* Charcoal (optional)
* Salt and Pepper

When BBQing Ribs, you will find both Pork and Beef ribs commonly, some places just say ribs and you get what ever they have that day.

There is a difference between the two:

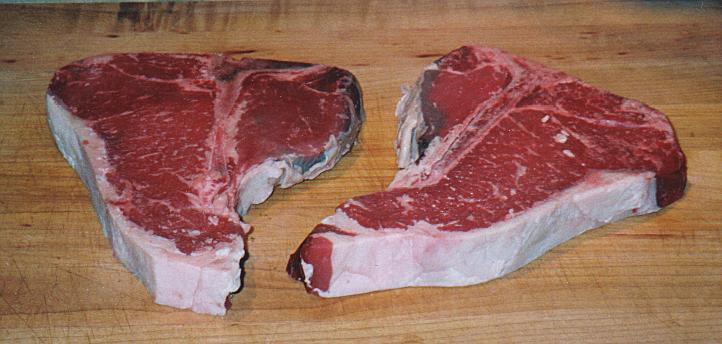
The Beef Ribs are less expensive, contain massive bones, and do not have quite as much meat as you might expect. It is my opinion the beef has a better natural flavor, however you cannot get the beef rib meat quite as tender as you can pork. I recommend that you try a batch of each and see which one you prefer. Normally, since the meat has more flavor I go with a less sweet sauce,therefore not covering up the meat. You do end up with a nice large handle to hold your food which is neat, small children may have more trouble eating the beef as opposed to the pork.

The Pork Ribs come in two different cuts, the flagship pork loin or “baby back” cut and the spare rib cut. If money is not a factor always go for the baby back as this will yield the higher quality meat without the fat/veins. Maybe it is just me but Pork fat is not as nearly as appetizing as Cow fat. The Baby back ribs have small bones, and the meat is very high quality and tender. and spaced evenly among the whole cut. The cut further down the rib is called the Spare Ribs, The Spare Ribs have a fold and more fat inside the meat. You can also find veins occasionally which gross some people out. You can still find some great meat on a spare rib, it is more work biting and cutting around the fat. You can find them at half the cost of baby backs though.

Prepare your Ribs

Your ribs may come fresh or frozen, as far as taste is concerned I have not found any differences. We bought ours in bulk frozen and we have bought them fresh over the counter. If your ribs are frozen, allow them to sit in your refrigerator until they are completely thawed before preping them. As always, clean your prep are as well as your hands. Upon unwrapping, we normally rinse them prior to cutting them in half, of course cutting them is not a necessity if you want the look of a full rack on table. Halfs are easier to deal with and are the perfect size for our foil packs we will be using.

The first thing we remove is the clear membrane located on bottom of the ribs located on the bone side, not the meat side. The easiest way to remove is start on one end and slowly separate it as you pull down the rest of the rib. This can be quite a challenge, its ok if you cannot remove every little piece. But this is one of the secrets that will allow the rib meat to pull right off the bone when consuming. Both Beef and Pork ribs have this membrane, in some cases the membrane will already be removed but not very often.
Ok, now for the most important part of the cook, the secret to tender ribs is steaming them in their own juices and maybe a little we will add. Take a large piece of aluminum foil and center the rib half on it bone down making a rainbow shape. Pork meat in particular is pretty dependent on flavor, so now is the time you will rub the ribs down with dry rub, add salt/pepper and a few dashes of Italian dressing. The Italian dressing will not only add a little flavor but will be there to create our steam. We will add a few basic rub recipes on the site for you to start with as well.

Now create your air tight packet by folding the sides over the rib half then rolling it tightly down. Ensure no air can escape so that we steam the ribs properly. Prepare your remaining rib halves using this method.

How to BBQ your Ribs

Put either in Oven or smoker for approximately 2 hours at 300 degrees. I would check on them at an hour and a half though. They are so small, I never really check with a meat thermometer you just learn to tell when they are done. When ribs begin to get done, the meat shrinks and bone is visible. I also pick them up and see how flexible they are you want to pull them out of the foil pack when you begin to see the bone and they are pretty flexible but not quite falling apart. They will get to that point if you let them steam for too long.

Upon completing this part of the cooking process and removing them from the foil pack. You will notice how tender these babies are! Now it is time to BBQ and get some flavor in that meat. Smoke them for another 30 minutes, rib meat absorbs smoke flavor easily so if you are using a stronger wood like hickory or mesquite be careful not too over smoke. I do normally flip them and allow both side to smoke for some time. It is optional if you want to add sauce at this point of the cook, it is really personal preference. You have probably heard not to burn your BBQ sauce because it is a tomato based product, well I love burning my sauce on the outside of the rib to create a little bark. Just don’t over do it!

Another optional finish after the oven cook is grilling over charcoal, this too can create a nice flavor or bark, but too me does not match the BBQ flavor. Grilling them over charcoal does not take long, just a few minutes on each side and you are done. When serving, pork ribs seem to compliment a sweeter sauce, while the Beef is perfectly fine with a mild or even a spicy sauce. But this is just personal preference…… Don’t just sit there, go ENJOY your Meat Fallin’ off the bone BBQ Ribs that you made!

How To BBQ - Ribs
by Joe "Woods Goods and Stuff"

Monday, September 24, 2007

How To BBQ - Dry Rubs


How To BBQ - Dry Rubs
by Joe “Woods Goods and Stuff


For those of you looking to try a How to BBQ - Dry Rub on your ribs here are a few recipes that are pretty good. You can always create your own Rub. I would just start with about 4 spices as a base and then you can grow from there. Now, go grow your own Rub. Have Fun!

Rub 1:
1 cup brown sugar
3 tablespoons fresh cracked black pepper
2 tablespoons cumin
2 tablespoons white pepper
2 tablespoons cayeene pepper (adjust to taste)
1 tablespoon curry powder
1 tablespoon red pepper flakes
1 tablespoon paprika
2 tablespoons garlic powder
1 tablespoon onion powder
1/4 cup kosher salt coarse ground

Rub 2:
2 tbsp salt
2 tbsp sugar
4 tbsp brown sugar
2 tbsp ground cumin
2 tbsp chili powder (heat to taste)
1 tbsp ground black pepper
1 tsp cayenne pepper
3 tbsp paprika (sweet)
1 tbsp garlic powder
1 tsp onion powder


How To BBQ - Dry Rubs
by Joe “Woods Goods and Stuff

How To BBQ - Simple Marinade


How To BBQ - Simple Marinade
by Joe “Woods Goods and Stuff

How To BBQ - Simple Marinade
INGREDIENTS:

1 1/2 cups red wine, good enough to drink
1/2 cup extra virgin olive oil
1 1/2 tablespoons mustard powder
1 1/2 tablespoons lemon juice from an actual lemon
1 tablespoon wine vinegar
1 tablespoon horseradish
1 1/2 teaspoons salt
1 teaspoon cayenne pepper
1 teaspoon onion powder
1 teaspoon garlic powder
1 teaspoon black pepper

PREP:
Mix all ingredients together. Pour over meat and let marinate overnight in the refrigerator. Remove meat from your marinade the next day and cook anyway you wish.

Sorry, couldn't find a Marinade picture so your going to have to settle for a picture of Rachael Ray featured by FHM.

How To BBQ - Simple Marinade
by Joe “Woods Goods and Stuff

How To BBQ - Cooking Tips 101


How To BBQ - Cooking Tips 101
by Joe “Woods Goods and Stuff

How To BBQ - Cooking Tips 101
Cooking thermometers take the guesswork out of cooking, as they measure the internal temperature of your cooked meat, fish and poultry to assure that a safe temperature has been reached, harmful bacteria have been destroyed, and your food is cooked perfectly. A cooking thermometer should not be a "sometimes thing." Use it every time you prepare foods like poultry, roasts, hams, meat loaves etc...

Simply cutting into a steak or any piece of meat to see if it's done is a very amateur way of cooking, which will always dry out your meat. It releases all of the juices and flavor, and in some countries you can be shot for something like this. This is the reason you should always use tongs instead of a fork when handling your steaks.

20 minute per pound for large pieces of meat is a calculation you can use that will tell you when to put your meat in the oven or on the BBQ. Before the end of your time, you will use your thermometer to confirm that it is done just the way you want it... After the desired cooking temperature is reached, remove meat from heat source and let stand 5 to 15 minutes before cutting. The amount of resting time varies with the size of your meat. During resting time, all meat continues to cook (meat temperature will rise 5 to 20 degrees after it is removed from the heat source) and the juices redistribute. This means you have to undershoot the allotted time amount, removing your meat from the grill or oven just before it reaches the desired temperature. Undershooting is a best way since you can always throw it back on the grill, if no one is looking obviously! You certainly can't un-cook meat once it's overcooked.

Testing your meat for "Done-ness" with your thermometer

Once you suspected that your meat maybe done, take your instant read thermometer, poke it into the center and allow it to take a reading. Based on the internal temperature you can tell when the steak is done to your liking. Over poking with your thermometer is prohibited. I tend to keep my temperature a bit lower than below to ensure that I don't over cook!

Beef - Veal - Lamb - Bison - Elk
Very Rare - 120F - blood red in the center and barely warm (a good vet might still save the cow J)
Rare - 125F - red in the center and warm throughout
Medium-Rare - 130F - 135F - pinkish red in the center and fairly hot
Medium - 140F - 145F - pink in the center, grayish brown surrounding, hot throughout
Medium-Well - 150F - 155F - grayish brown center, only a trace of pink
Well-Done - 160F - gray in the center

Poultry whole
Well-Done 180F cook until juices run clear

Pork
Medium - 140F - 145F - pink in the center, grayish brown surrounding, hot throughout
Well-Done - 160F - gray in the center

Ground meat & Sausage
well-Done 160F to 165F - no pink at all

Fish
(steaks, filleted or whole) 140F - Tuna - Swordfish - Marlin 125F

How To BBQ - Cooking Tips 101
by Joe “Woods Goods and Stuff

How to BBQ - Grilling Corn on the Cob


How to BBQ- Grilling Corn on the Cob
by Joe “Woods Goods and Stuff

How to BBQ - Grilling Corn on the Cob
Ingredients
1 teaspoon chili powder
1/8 teaspoon dried oregano
1 pinch onion powder
Cayenne pepper to taste
Garlic powder to taste
Salt and pepper to taste
1/2 cup butter, softened
6 ears corn, husked and cleaned

Preheat grill for medium-high heat. In a medium bowl, mix together the chili powder, oregano, onion powder, cayenne pepper, garlic powder, salt, and pepper. Blend in the softened butter. Apply this mixture to each ear of corn, and place each ear onto a piece of aluminum foil big enough to wrap the corn.

Wrap like a burrito and twist the ends to close. Place wrapped corn on the preheated grill, and cook 20 to 30 minutes, until tender when poked with a fork. Turn corn occasionally during cooking.

How to BBQ - Grilling Corn on the Cob
by Joe “Woods Goods and Stuff

How to BBQ - Grilling Salmon


How to BBQ - Grilling Salmon
by Joe “Woods Goods and Stuff

How to BBQ - Grilling Salmon
Ingredients:

2 salmon fillets
2 cups olive oil
1/4 cup spicy mustard
3 tablespoons white wine vinegar
1 teaspoon thyme
2 teaspoons rosemary

Directions: Grilling Salmon
Whisk all marinating ingredients together. Lay the salmon, skin side down, in the marinade for 1/2 hr. Turn the salmon over and marinate for another hour. Start salmon on the grill with the skin side up, and cook for a short time, about 3-4 minutes, turn and cook another 6-8 minutes as desired.
Serves/Makes: 2

How to BBQ - Grilling Salmon
by Joe “Woods Goods and Stuff

How To BBQ - Welcome


How To BBQ - Welcome
by Joe "Woods Goods and Stuff"

Welcome to "How To BBQ", here you will find posts with BBQ recipes and tips on
"How To BBQ". Regardless what kind of grill you have, you should be able to find helpful hints and recipes to send you on wonderful adventures with your grill. So, don't let me keep you, go find what you're looking for. Also, If there is something you don't see here please leave a comment and I will help you in your quest. Thank You.

How To BBQ - Welcome
by Joe "Woods Goods and Stuff"